It’s easy when you know how.
IT’S EASY WHEN YOU KNOW HOW
• WORDS: C. STEWART
When you’ve got a big event to get ready for, the last thing you need is the added stress of fiddling around with your accessories.
If you’re not confident in tying your own bow tie, then a pre-tied bow tie will speed the process up. By ‘pre-tied’, it means the bow is already in place, but you still have to adjust the neck strap to fit you snugly. A droopy bow tie will ruin the lines of your sharp eveningwear, so here’s how to fit yours like a pro.
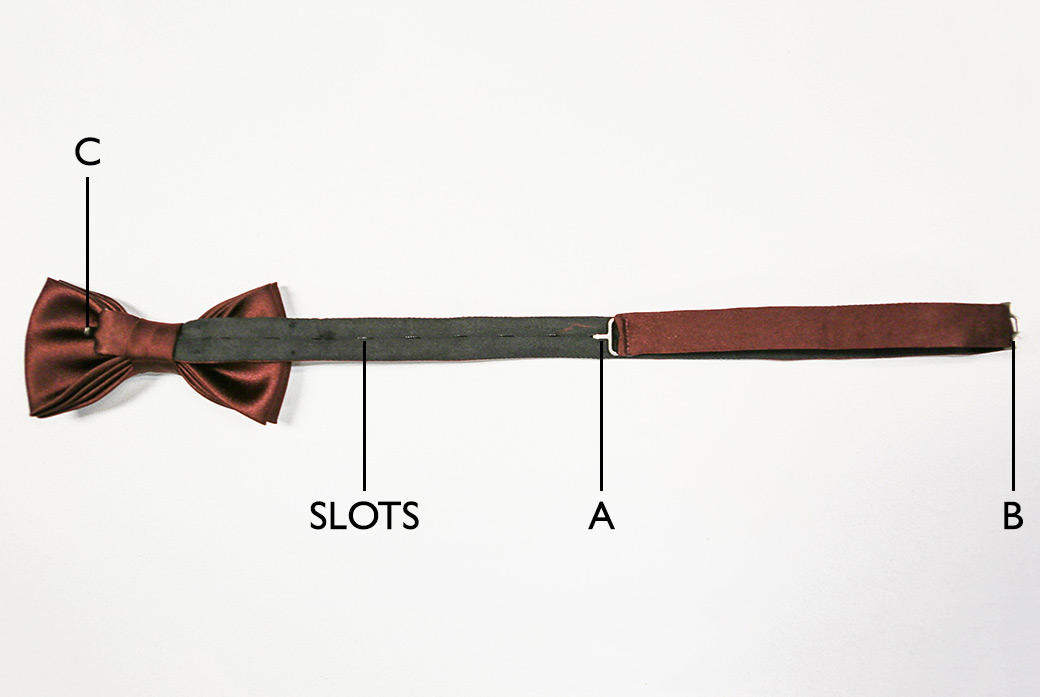
First of all, a quick meet-the-tools guide. Clip A is a T-shaped bar at the end of the strap that goes into the slots on the back of the strap to adjust the fit. Clip B is a movable bar on the strap that you’ll connect to clip C, a hook on the back of the bow itself.

STEP BY STEP
-
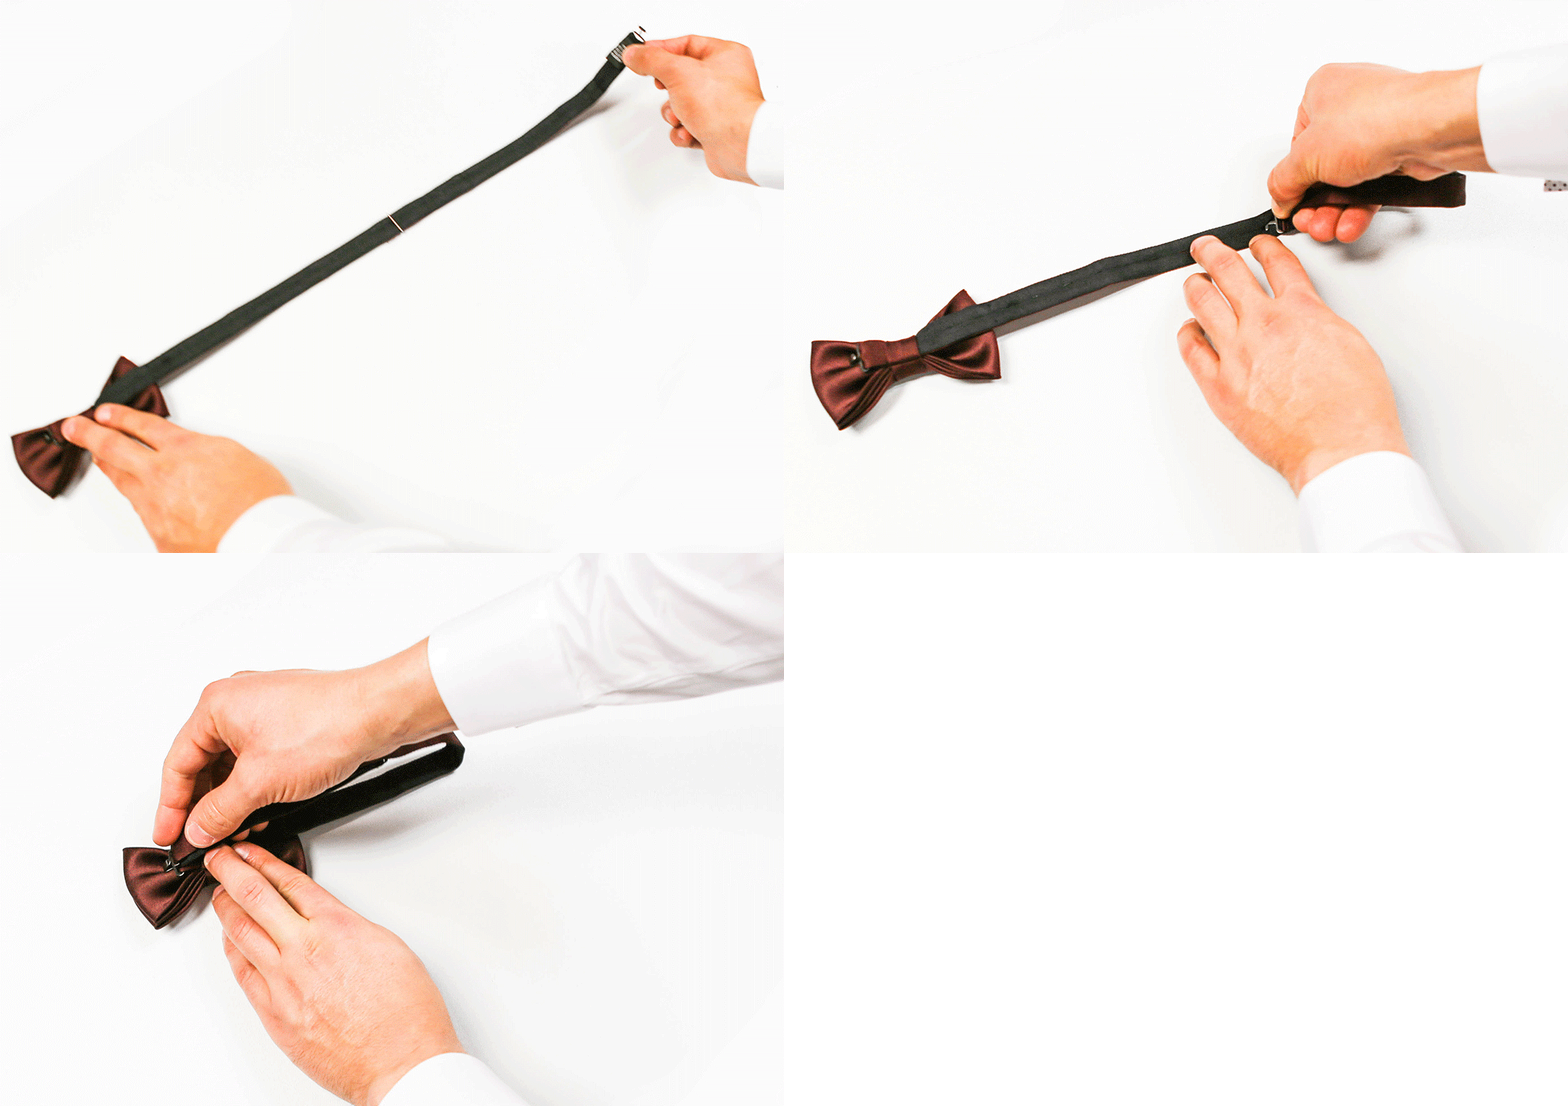
- Take clip A and fold the bow tie’s strap back on itself to a length that will fit snugly around your neck, with clip B at the end
- Fix the length by sliding clip A into one of the slots on the back of the strap
- Hook clip B onto clip C to secure your bow tie – if it’s too loose or tight, move clip A into a neighbouring slot to adjust the fit
Once your bow tie’s on, adjust its sides and plump them out a little. A flat bow tie is a sure giveaway that it’s pre-tied. There’s no shame in a pre-tied bow tie but a little artful illusion never hurt anyone.


